What Is a Tincture (And Why Make Your Own)?

If you’ve ever wandered into a health food store and admired those little amber bottles lining the shelves, you’ve seen tinctures in action. A tincture is simply a concentrated herbal extract made by soaking plant material in a solvent (usually alcohol) to draw out the beneficial compounds. It’s one of the oldest and most effective forms of herbal medicine, used for centuries across cultures around the world.
So why learn how to make a tincture at home? The reasons are wonderfully practical. First, it saves you a significant amount of money. A single ounce of echinacea tincture can cost $12–$18 at a store, while making your own yields several ounces for a fraction of the price. Second, you control the quality. You choose the herbs, you choose the alcohol, and you know exactly what goes into each bottle. Third, and this is my favorite part, making tinctures connects you to a tradition of self-reliance and plant wisdom that feels deeply grounding in our modern world.
The best part? It’s remarkably simple. If you can fill a jar and pour liquid, you can make a tincture. Let me walk you through everything you need to know.
What You’ll Need: Equipment & Supplies
Before we dive into the process, let’s gather our supplies. The beauty of tincture-making is that you probably already have most of what you need in your kitchen.
- Clean mason jars: Pint or quart-sized, with tight-fitting lids. Wide-mouth jars are easiest to work with.
- 80-proof vodka: This is your menstruum (solvent). Vodka works beautifully because it’s 40% alcohol and relatively flavorless. Brandy is another option if you prefer a warmer taste. For alcohol-free alternatives, use food-grade vegetable glycerin.
- Dried herbs (or fresh, depending on your recipe): Always source from a reputable supplier. Organic is ideal.
- Labels and a permanent marker: Trust me, you will not remember what you put in that jar three weeks from now. Label everything.
- Fine mesh strainer and cheesecloth: For straining your finished tincture. A potato ricer or tincture press also works well for squeezing out every last drop.
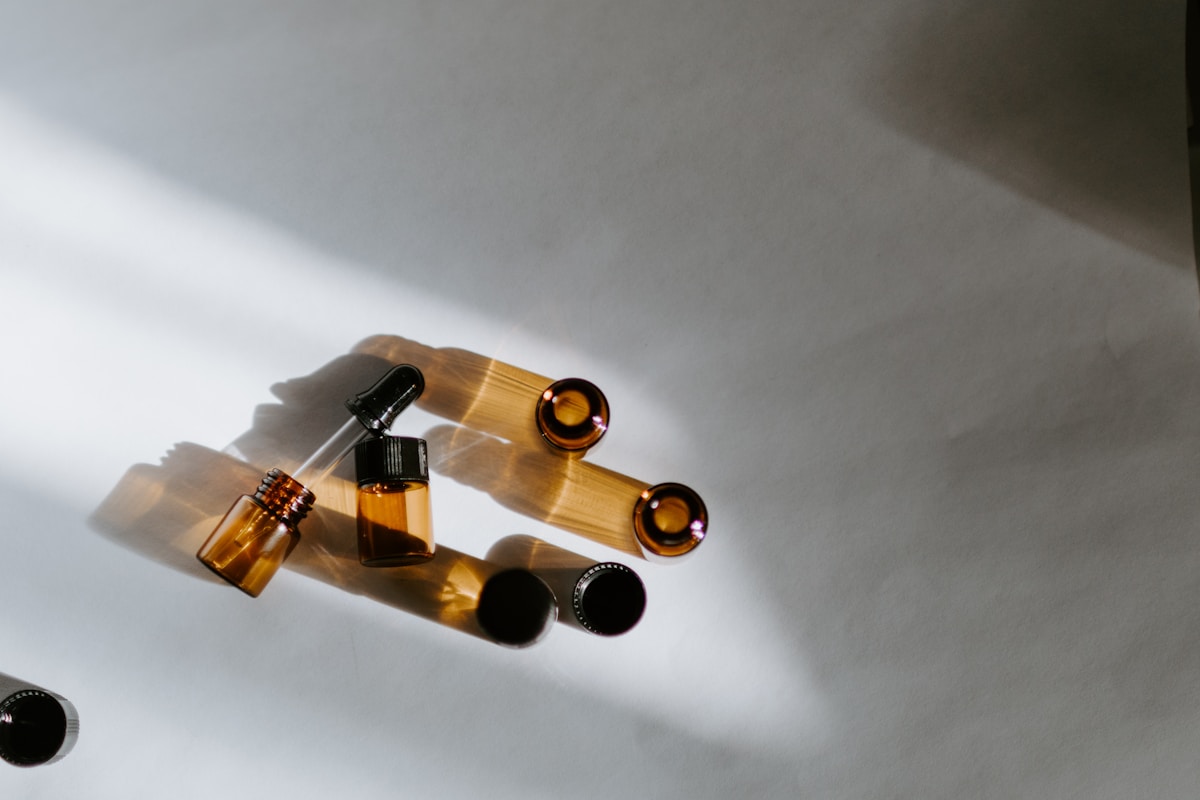
- Dark glass dropper bottles: Amber or cobalt blue bottles (1 oz or 2 oz) protect your tincture from light degradation and make dosing easy.
- Small funnel: Optional, but makes bottling much less messy.

Two Approaches: Folk Method vs. Weight-to-Volume Method

There are two main schools of thought when it comes to making tinctures, and it’s worth understanding both before you start.
The Folk Method (Simpler’s Method)

This is the traditional, intuitive approach that herbalists have used for generations. You fill your jar with herb, pour alcohol over it until the plant material is completely covered, and let time do its work. There’s no scale involved, no precise measurements, just a practiced eye and patience.
The folk method is where I always recommend beginners start. It’s forgiving, intuitive, and produces genuinely effective tinctures. Precision matters in pharmacy; in the home apothecary, consistency and care matter more.
The Weight-to-Volume Method

This is the more standardized, clinical approach. You weigh your herb and measure your solvent to create a specific ratio:
- Dried herbs: Typically a 1:5 ratio (1 part herb by weight to 5 parts alcohol by volume). So 100 grams of dried chamomile would go into 500 ml of alcohol.
- Fresh herbs: Typically a 1:2 ratio (1 part herb by weight to 2 parts alcohol by volume), since fresh plants contain water that dilutes the menstruum.
The weight-to-volume method is excellent for reproducibility and is what professional herbalists and pharmacies use. As you gain experience, you may want to graduate to this approach. But for your first tincture? The folk method is perfect.
Step-by-Step: How to Make a Tincture (Folk Method)

Here’s your complete walkthrough. Take your time, enjoy the process, and know that you’re doing something people have done for hundreds of years.
Step 1: Choose Your Herb

Start with a single herb for your first tincture. This lets you learn the process without complicating things, and you’ll get to know the unique character of that plant. I have some recommendations for beginner-friendly herbs below, but choose whatever resonates with you and matches your wellness goals.
Make sure your herbs are high-quality. If using dried herbs, they should be aromatic, vibrant in color, and sourced from a trusted supplier — and if you’re drying your own harvest, knowing how to dry and store your herbs properly makes all the difference. If using fresh herbs from your garden, harvest them in the morning after the dew has dried, when their volatile oils are at their peak. If you want to start growing your own herbs for tinctures, our sister site Wild Hearth Life covers gardening and homesteading for self-sufficient living.
Step 2: Fill Your Jar

For dried herbs, fill your clean mason jar 1/3 to 1/2 full. Dried plant material will expand as it absorbs the alcohol, so you need to leave room. If you pack the jar too tightly, the alcohol won’t be able to circulate properly.
For fresh herbs, chop them coarsely and fill the jar about 2/3 full. Fresh herbs contain water, so you need more plant material to achieve a strong extraction.
Step 3: Add Your Menstruum

Pour 80-proof vodka over the herbs until the jar is full and all plant material is completely submerged. This is important: any herb poking above the liquid line can develop mold. Use a butter knife or chopstick to release any trapped air bubbles, then top off with more vodka if needed.
Why 80-proof? It provides the ideal balance of alcohol (40%) and water (60%) that extracts both alcohol-soluble and water-soluble plant compounds. Some resins and tougher plant materials may call for higher-proof alcohol (like 190-proof grain alcohol), but 80-proof vodka handles the vast majority of herbs beautifully.
Step 4: Label Everything

This step sounds small, but it’s essential. On your label, write:
- The herb name (common and Latin if you know it)
- The menstruum used (e.g., “80-proof vodka”)
- The date you started
- Whether the herb was fresh or dried
I’ve learned this lesson the hard way. A shelf full of unlabeled amber jars is a beautiful mystery that no one wants to solve by taste-testing.
Step 5: Steep for 4–6 Weeks
Place your sealed jar in a cool, dark location (a cupboard, pantry shelf, or closet works perfectly). Direct sunlight degrades the beneficial compounds you’re working to extract.
Shake the jar once daily. This isn’t just ritual (though there’s something lovely about the daily practice). Agitation helps the solvent penetrate the plant cells more effectively and ensures a thorough extraction. If you forget a day here and there, don’t worry; your tincture will still turn out fine.
Most tinctures are ready after 4 to 6 weeks. Some herbalists macerate for as long as 8 weeks. Longer steeping generally means a more potent extraction, but 6 weeks is the sweet spot for most herbs.
Step 6: Strain and Bottle
When your tincture is ready, it’s time to strain. Set a fine mesh strainer lined with cheesecloth over a clean bowl or large measuring cup. Pour the contents of your jar through the strainer, then gather the cheesecloth around the spent herbs and squeeze firmly to extract every last bit of liquid. This “marc” (the leftover plant material) can go into your compost.
Using a small funnel, pour the strained tincture into dark glass dropper bottles. Fill them almost to the top, leaving just enough room for the dropper. Seal tightly, label each bottle (herb, date, menstruum), and store in a cool, dark place.
That’s it. You’ve just made your first tincture.

Best Herbs for Your First Tincture

Not sure which herb to start with? These five are excellent choices for beginners: they’re widely available, well-studied, and forgiving to work with.
Echinacea (Echinacea purpurea): The classic immune-support herb. Echinacea tincture is one of the most popular home remedies, traditionally taken at the first sign of a cold. Use the root, flowers, or the whole plant. You’ll notice a distinctive tingling sensation on your tongue, which is a sign of quality.
Chamomile (Matricaria chamomilla): Gentle, soothing, and wonderfully aromatic. Chamomile tincture supports relaxation and digestive comfort. It’s a lovely one to keep on hand for stressful days or restless evenings. Use the dried flowers.
Lemon Balm (Melissa officinalis): A member of the mint family with a bright, lemony flavor. Lemon balm is traditionally used for nervous tension, mild anxiety, and sleep support. It grows abundantly in most gardens and makes a delicious tincture. Use fresh or dried leaves.
Valerian (Valeriana officinalis): The go-to herb for sleep support and one of the best researched herbs for sleep. Fair warning: valerian root smells quite strong (some say like old socks), but its traditional reputation as a sleep aid is well-earned. Use the dried root. This one benefits from a longer maceration, so aim for the full 6 weeks.
Calendula (Calendula officinalis): Bright, cheerful marigold flowers that produce a gorgeous golden tincture. Calendula is also one of the easiest medicinal plants to cultivate — see our list of 10 medicinal herbs every beginner should grow. Calendula is traditionally used both internally for lymphatic and immune support, and externally diluted for skin healing. Use the dried flower heads.
As you grow more comfortable with the process, you might explore making tinctures from medicinal mushrooms as well. Functional mushrooms like lion’s mane, reishi, and chaga have a rich tradition of use. For a detailed comparison, see our guide to functional mushroom comparison: lion’s mane vs. reishi vs. chaga vs. cordyceps vs. turkey tail. If you’re particularly interested in cognitive support, our article on lion’s mane mushroom benefits is a great place to start.
Dosing Basics: How Much Should You Take?

Dosing is where tincture-making gets a bit nuanced, because the appropriate dose varies by herb, by individual, and by what you’re using it for. That said, here are some general guidelines to get you started.
A common general dose for most herbal tinctures is 1–2 ml (roughly 1–2 dropperfuls), taken 2–3 times per day. You can take the drops directly under your tongue for fastest absorption, or add them to a small amount of water or tea if the taste of alcohol is too strong.
A full “dropperful” is not the entire glass tube filled to the top. It’s the amount drawn up when you squeeze and release the rubber bulb once, typically about 0.5–1 ml, depending on the dropper size.
Always start with a lower dose and work your way up. This allows you to observe how your body responds. Some people are more sensitive to certain herbs than others, and what works for a friend may be too much (or not enough) for you.
For specific dosing guidance on individual herbs, consult a reputable herbal reference book or work with a qualified clinical herbalist. Herbs like valerian may require higher doses for effect, while potent herbs like goldenseal (Hydrastis canadensis) typically call for smaller amounts.
Alcohol-Free Alternatives: Glycerites & Vinegar Extracts

If you prefer to avoid alcohol (whether for personal, health, or religious reasons) you have two excellent options.
Glycerites (Vegetable Glycerin Tinctures)

Food-grade vegetable glycerin is a sweet, syrupy liquid derived from plant oils. It’s the most popular alcohol-free alternative and is especially good for children’s remedies and for herbs where the taste of alcohol is particularly unpleasant.
To make a glycerite, follow the same folk method process above, but replace the vodka with a mixture of 3 parts vegetable glycerin to 1 part distilled water. The water is important because pure glycerin is too thick to effectively penetrate plant cells. Maceration time is the same: 4–6 weeks with daily shaking.
The trade-off? Glycerin is not as powerful a solvent as alcohol. It extracts tannins, some alkaloids, and mucilage well, but it’s less effective at pulling out resins and certain other compounds. Glycerites are also less shelf-stable than alcohol-based tinctures.
Apple Cider Vinegar Extracts

Raw, unpasteurized apple cider vinegar (ACV) is another traditional menstruum. ACV extracts are sometimes called “acetracts” or simply herbal vinegars. They have the added benefit of the vinegar’s own nutritive properties, including acetic acid and beneficial enzymes.
The process is identical to the folk method. Use raw ACV instead of vodka, and consider placing a piece of parchment paper between the jar and the metal lid to prevent corrosion. Maceration time: 4–6 weeks. ACV extracts have a milder potency compared to alcohol tinctures but are a wonderful addition to daily wellness routines and can be easily added to salad dressings and cooking.
Storage and Shelf Life

One of the great advantages of alcohol-based tinctures is their remarkable longevity. When stored properly, they have an incredibly long shelf life.
- Alcohol-based tinctures: 5–10 years, and often longer. The alcohol acts as a natural preservative. Some herbalists report tinctures maintaining potency well beyond a decade.
- Glycerites: 1–2 years. Glycerin is less effective as a preservative, so these have a shorter usable life. Refrigeration can extend this somewhat.
- ACV extracts: 6 months to 1 year. These are the most perishable of the three. Refrigerate after straining for best results.
For all types, the rules of storage are the same: keep them in dark glass bottles, stored in a cool, dark location, away from direct sunlight and heat sources. A medicine cabinet, pantry, or dedicated herb shelf all work well. Avoid storing tinctures near the stove or in the bathroom, where heat and humidity fluctuate.
Signs that a tincture has gone off include an unusual smell, visible mold, or cloudiness (in the case of glycerites and vinegar extracts). Alcohol tinctures rarely spoil, but if something looks or smells wrong, trust your instincts and discard it.
Safety Profile: Herbs Featured in This Guide
Individual herb profiles may vary by species, preparation, and dose. Drug-interaction classes to watch across these herbs include anticoagulants (warfarin), SSRIs and other sedatives/CNS depressants, immunosuppressants, and CYP450 substrates. For species-specific guidance, consult a qualified clinical herbalist and see our dedicated herb profile articles.
| Herb | Latin | Pregnancy / Lactation | Drug Interactions | Max Daily Dose (Adult) | Do Not Use If |
|---|---|---|---|---|---|
| Echinacea | Echinacea purpurea / angustifolia | Short-term use generally considered compatible; consult provider before regular use in pregnancy or lactation. | Immunosuppressants (cyclosporine, tacrolimus), CYP3A4 and CYP1A2 substrates, caffeine. | ~900 mg standardized extract/day, or 2–3 ml tincture up to 3× daily; limit continuous use to 8–10 weeks. | Autoimmune disease, progressive systemic disease (HIV, MS, TB), upcoming organ transplant, Asteraceae (daisy) allergy. |
| Chamomile | Matricaria chamomilla | Food amounts (weak tea) generally regarded as safe; avoid large medicinal doses in pregnancy — theoretical uterine-stimulant risk. | Warfarin and other anticoagulants, CYP1A2/CYP3A4 substrates, sedatives/benzodiazepines, cyclosporine. | ~1100 mg standardized extract/day, or up to 4 cups tea; 2–4 ml tincture 3× daily. | Asteraceae allergy (ragweed, daisies), surgery within 2 weeks, on warfarin or other blood thinners. |
| Lemon Balm | Melissa officinalis | Culinary amounts likely fine; medicinal doses in pregnancy/lactation not well-studied — consult provider. | Thyroid medications (may suppress TSH), sedatives, GABAergic drugs, barbiturates. | ~600 mg standardized extract/day, or 2–3 ml tincture up to 3× daily. | Hypothyroidism or on thyroid replacement, glaucoma, surgery within 2 weeks. |
| Valerian | Valeriana officinalis | Avoid in pregnancy and lactation — insufficient safety data and potential CNS effects on fetus/infant. | Alcohol, benzodiazepines, barbiturates, other sedatives; CYP3A4 substrates; additive CNS depression. | ~600 mg root extract/day, or 3–5 ml tincture 30–60 min before bed; do not combine with other sedatives. | Pregnant or nursing, driving/operating machinery, liver disease, surgery within 2 weeks, on CNS depressants. |
| Calendula | Calendula officinalis | Topical use generally considered safe; avoid oral medicinal doses in pregnancy — emmenagogue and potential uterine stimulant. | Sedatives (mild additive), antihypertensives, hypoglycemics; theoretical interactions with serotonergic drugs. | 1–2 g dried flower/day internally, or 1–2 ml tincture 3× daily; topical use unrestricted. | Pregnant (oral medicinal dose), Asteraceae allergy, on sedatives or blood pressure medications. |
| Goldenseal | Hydrastis canadensis | Contraindicated in pregnancy and lactation — berberine may stimulate uterine contractions, crosses the placenta, and displaces bilirubin in neonates. | Blood thinners (warfarin), cyclosporine, metformin, SSRIs, CYP3A4 and CYP2D6 substrates; many prescription drugs. | ~1 g dried root/day (short term only); 2–4 ml tincture up to 3× daily; do not exceed 2–3 weeks continuous use. | Pregnant or nursing, high blood pressure, liver disease, on SSRIs or CYP450-metabolized prescription drugs, infants. |
Know before you dose: If you take prescription medication — especially anticoagulants, SSRIs, sedatives, immunosuppressants, thyroid medication, or any drug metabolized by the liver — talk with a pharmacist or clinical herbalist before starting any herbal tincture. Herb-drug interactions are real and not always well-publicized.
Frequently Asked Questions
Can I use something other than vodka for my tincture?

Absolutely. Brandy, rum, and gin are all suitable alternatives — just make sure whatever you use is at least 80 proof (40% alcohol). Brandy adds a warmer, slightly sweet flavor that pairs nicely with herbs like chamomile and lemon balm. Avoid flavored or sweetened spirits, as additives can interfere with extraction and reduce shelf life. For a completely alcohol-free approach, vegetable glycerin or raw apple cider vinegar are your best options.
How do I know if my tincture is working?

A well-made tincture should have a strong color (often deep amber, green, or golden depending on the herb) and a pronounced taste and aroma. Echinacea tincture should produce a noticeable tingling on the tongue. Chamomile should smell sweet and floral. In terms of effects, herbal remedies often work subtly and cumulatively. Give a tincture at least 2–3 weeks of consistent use before evaluating its effects. Some herbs like valerian may produce noticeable results within a single dose, while others build over time.
Is it safe to give tinctures to children?

Alcohol-based tinctures can be given to children in very small doses (the amount of alcohol in a few drops is negligible, comparable to what naturally occurs in ripe fruit). However, many parents prefer to use glycerites for children, as they’re naturally sweet and contain no alcohol. If using alcohol tinctures, you can also add the drops to a small cup of hot water or tea and wait a few minutes; some of the alcohol will evaporate. Always consult your child’s pediatrician before using herbal remedies, and use age-appropriate dosing (a common guideline is Clark’s Rule or Young’s Rule for adjusting adult doses).
Can I mix multiple herbs in one tincture?

Yes, and this is actually a time-honored tradition in herbalism. Multi-herb tinctures are called “formulas” or “blends.” However, I’d recommend making single-herb tinctures first so you understand how each plant works individually. Once you’re comfortable, you can either blend finished tinctures together (the easier approach, and it lets you adjust ratios) or macerate multiple herbs together in one jar. When blending, start simple: two or three complementary herbs is plenty. Classic combinations include chamomile with lemon balm for relaxation, or echinacea with elderberry for immune support.
The Bottom Line

Learning how to make a tincture is one of the most empowering skills you can develop on your journey into herbal wellness. With nothing more than a mason jar, some good herbs, and a bottle of vodka, you can create potent, shelf-stable herbal extracts that serve your family for years to come.
Start simple. Choose one herb that calls to you, follow the folk method outlined above, and give yourself permission to learn as you go. Your first tincture won’t be your last — once you see how straightforward and rewarding the process is, you’ll likely find yourself building an entire home apothecary one jar at a time.
That’s the heart of what we’re about here at The Forager’s Apothecary: reclaiming traditional knowledge, one plant at a time, and finding confidence in our ability to care for ourselves and the people we love.